How to Move Boards From One Bitsboard App to Another
Step-by-step guide on how to move, transfer, or sync custom boards between Bitsboard apps (such as Bitsboard Free to Bitsboard PRO) or across different iOS devices.
How to Move Boards From One Bitsboard App to Another
Whether you are upgrading from the Bitsboard Free app to Bitsboard PRO, switching to a new iPad or iPhone, or sharing custom lessons with family members or students, moving your custom boards is straightforward.
Bitsboard gives you multiple flexible ways to move boards. Here is a summary of all available methods ranked from easiest (automatic bulk sync) to manual (one-by-one transfer):
| Method | Best For | Effort | Cost / Account |
|---|---|---|---|
| 1. Automatic Cloud Sync | Moving all boards, classes, settings & stats at once | Easiest (Automatic) | Free Bitsboard account with Cloud Sync |
| 2. Bitsboard Classes & Superuser | Teachers & parents managing multiple devices | Very Easy (Automatic) | Free Bitsboard account |
| 3. QR Code & Direct Link | Quick single-board transfer without an account | Easy (1 tap / scan) | 100% Free (No account needed) |
| 4. Share via Email / AirDrop / Files | Direct offline or peer-to-peer board transfer | Easy (Send & tap) | Free (Uses Apple Mail / AirDrop / Files) |
| 5. Dropbox Backup & Import | Bulk board management & computer backups | Moderate (Folder export) | Free Dropbox account |
| 6. Bitsboard Catalog Search | Public or private download via catalog search | Manual (Board by board) | Free Bitsboard account |
Option 1: Automatic Cloud Sync (Easiest & Recommended)
If you are upgrading from Bitsboard Free to Bitsboard PRO or setting up a new device, Cloud Sync is the easiest method. It moves everything—including all your custom boards, audio recordings, images, user settings, and learning history—automatically.
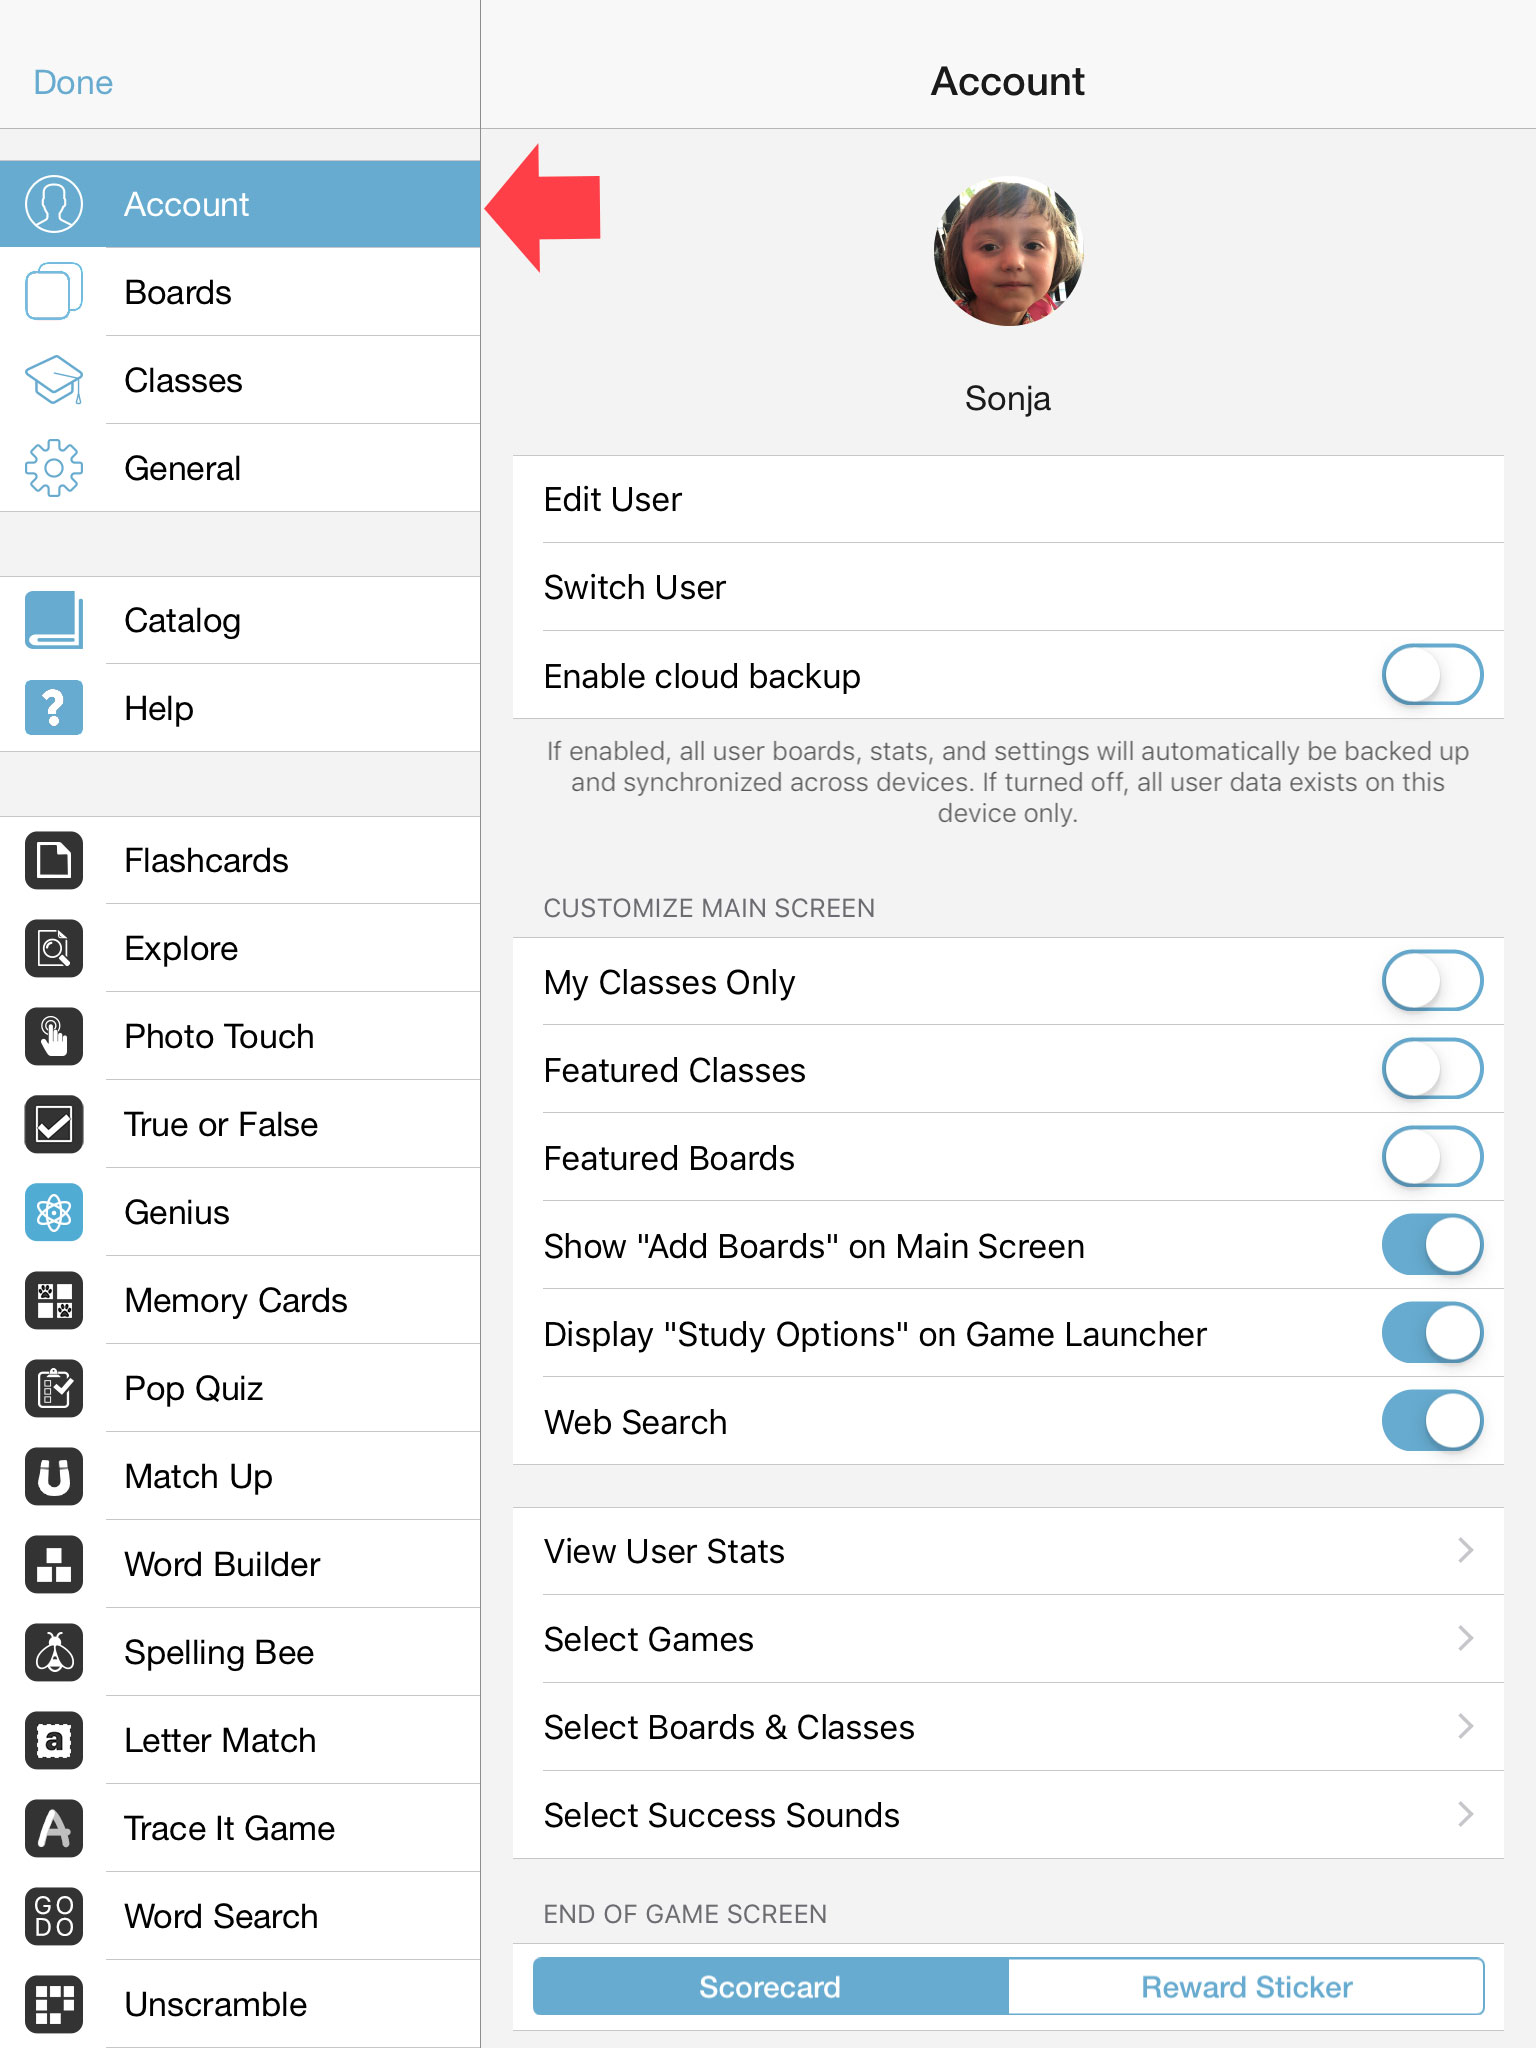
Steps:
- In your current (source) app:
- Go to Settings > Account.
- Sign in to your registered Bitsboard account (or create a free account with your email and password).
- Tap Edit User and make sure Cloud Sync is toggled ON.
- Allow a minute for your boards and data to sync to the cloud.
- In your new (target) app (e.g., Bitsboard PRO on your new device):
- Open Bitsboard and go to Settings > Account.
- Log in using the exact same email and password.
- Turn Cloud Sync ON.
- Voila! All your custom boards and settings will download automatically in the background.
[!TIP] Make sure both devices are connected to Wi-Fi while performing the initial cloud synchronization.
Pro-Tip: "The PRO Account Trick" (If You Had Trouble Upgrading)
If you've been using the Bitsboard Free app as a local user (or had trouble creating an account in the Free app) and now bought Bitsboard PRO, here is a fail-proof trick to pull all your boards over:
- Download & open Bitsboard PRO on your device.
- In the PRO app, go to Settings > Account and create your fresh Bitsboard account (email and password). Make sure Cloud Sync is turned ON.
- Now, switch over and open your Bitsboard Free app.
- In the Free app, go to Settings > Account (or tap your user profile) and log into the new account you just created in PRO.
- Ensure Cloud Sync is turned ON in the Free app. The Free app will instantly upload all your local boards and custom cards to your cloud account.
- Switch back to Bitsboard PRO — within seconds, all your boards and content from the Free app will download and populate in PRO!
Option 2: Bitsboard Classes & Superuser (Best for Schools & Families)
If you manage multiple devices (for your children, classroom, or speech therapy clients), using Bitsboard Classes and a Superuser account lets you centralize all boards in one place and keep them synchronized everywhere.

Steps:
- In your primary Bitsboard app, organize your boards into a Class (e.g., "Grade 1 Phonics" or "Speech Practice").
- On your other device or student app, request to join the class or link the user profile to your Superuser account.
- Every time you add, edit, or remove boards from that class, all connected apps will automatically reflect the changes.
Learn more in our Bitsboard Classes Guide and Manage Users Guide.
Option 3: QR Code & Direct Share Link (Fast & 100% Free)
If you only want to move one or two individual boards and don't want to create or sign into an account, you can transfer boards instantly using a QR code or direct share link.
Steps:
- In the source app, tap the Share icon (upward arrow) on the board you want to move.
- Select Share via QR Code / Link.
- On the receiving iPad or iPhone:
- Open the native iOS Camera app and point it at the QR code on the source screen.
- Tap the banner that appears to open the link directly in Bitsboard or Bitsboard PRO.
- The board will download and install instantly.
Option 4: Share via Email, AirDrop, or Files App
You can export any board as a self-contained .bitsboard board file and send it directly between apps or devices using Apple Mail, AirDrop, or the iOS Files app.
Steps:
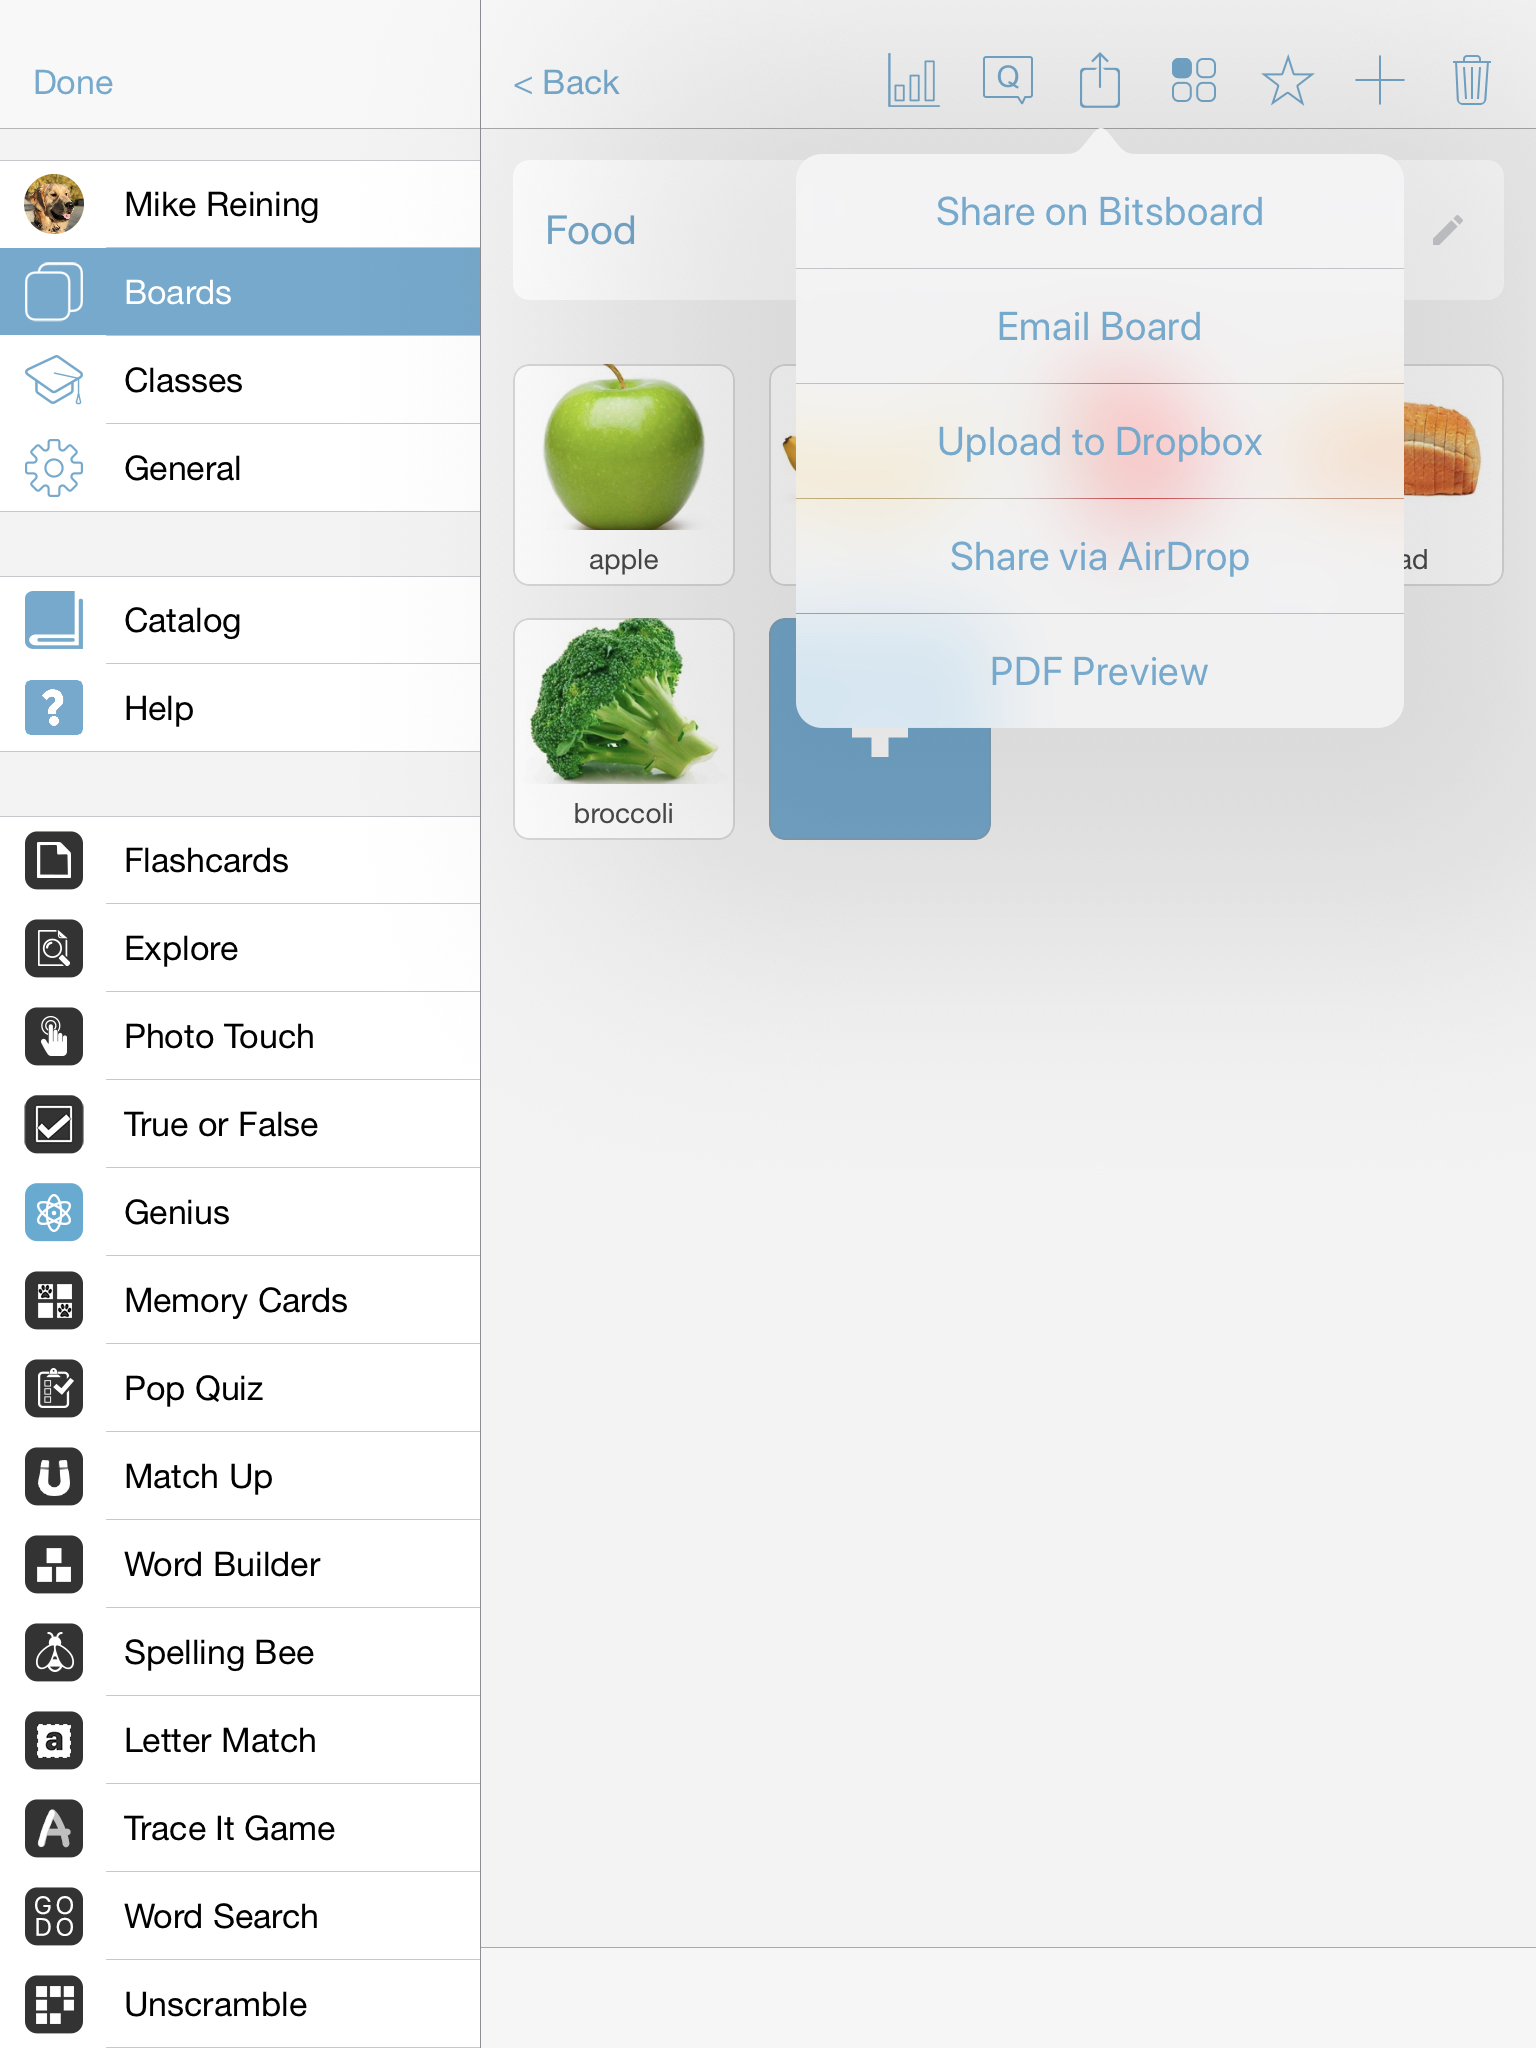
- In the source app, tap the Share button on the board and select Email Board (or Share to AirDrop / Files).
- Send the board to your email address or AirDrop it directly to your other Apple device.
- On the receiving device:
- Open Apple Mail or the Files app.
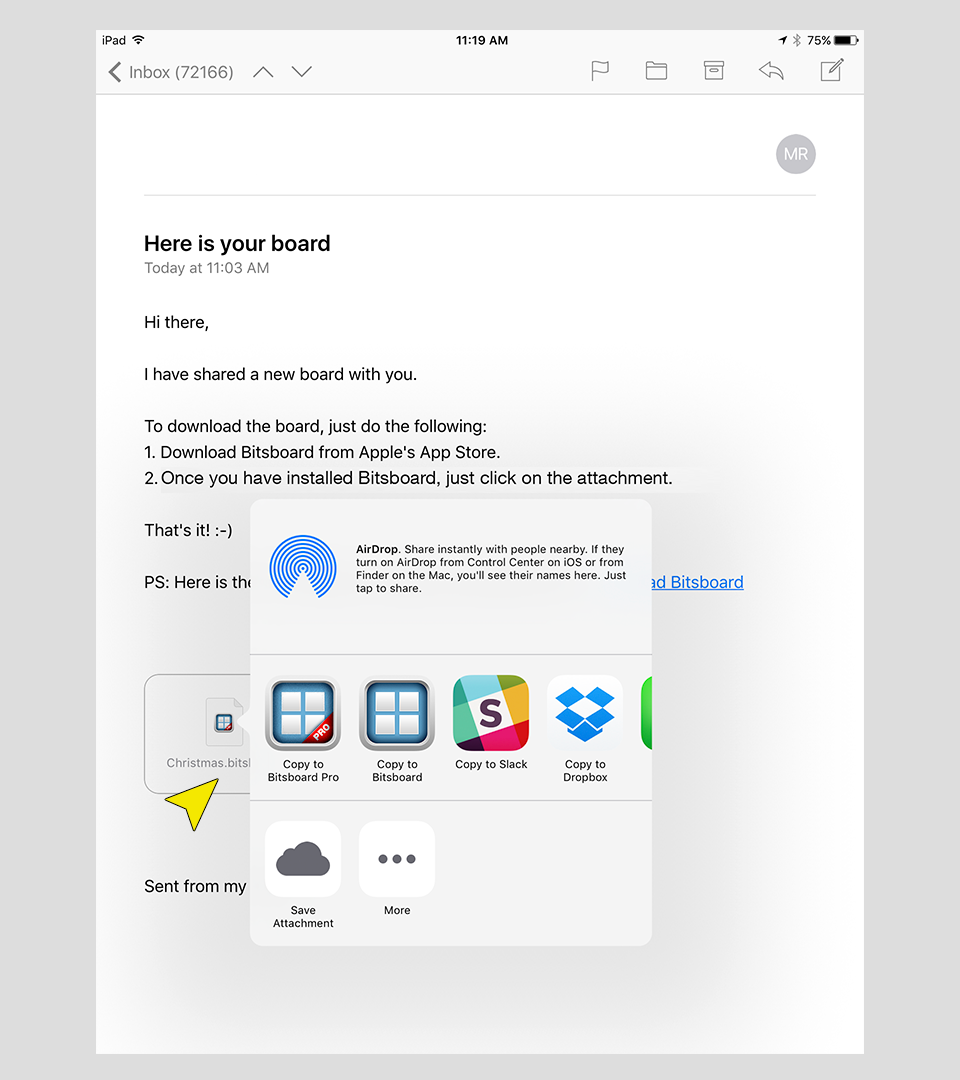
- Tap the board attachment to download it.
- Tap the attachment again and choose Bitsboard (or Bitsboard PRO) from the app list.
For detailed screenshots, see our Share Boards via Email Guide.
Option 5: Backup & Import via Dropbox (Great for Bulk Archives)
Dropbox is ideal if you have created dozens of custom boards with custom audio and photos and want a complete offline copy on your computer as well as in your new app.
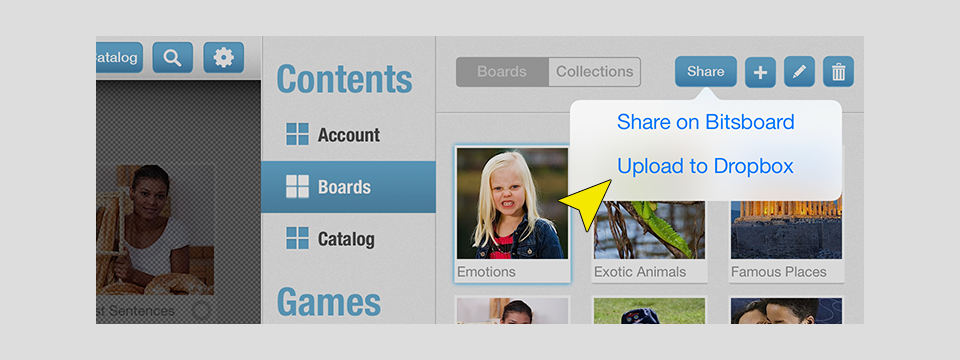
Steps:
- Export to Dropbox:
- In the source app, tap the board's Share button and select Upload to Dropbox.
- Connect your Dropbox account when prompted.
- Import from Dropbox:
- In the new app, navigate to Settings > Boards.
- Tap the "+" (Add Board) button at the top.
- Select Import from Dropbox.
- Choose the board folder you wish to import.
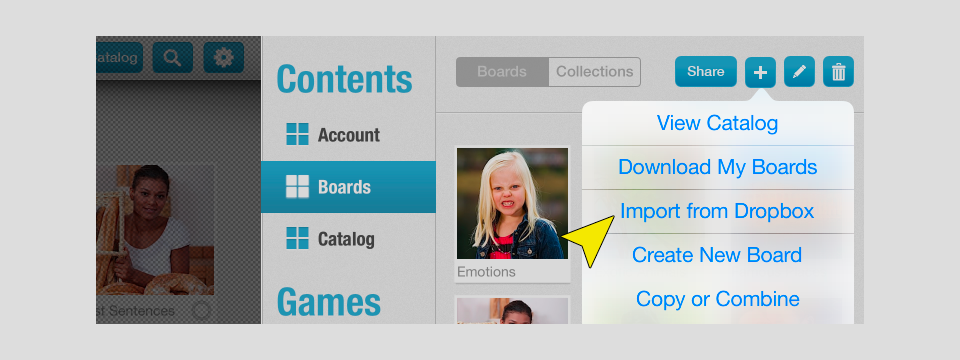
For computer workflows, see Backup Your Boards With Dropbox and Create & Import Boards from Computer with Dropbox.
Option 6: Search & Download from the Bitsboard Catalog
You can also transfer boards via the public Bitsboard Catalog.
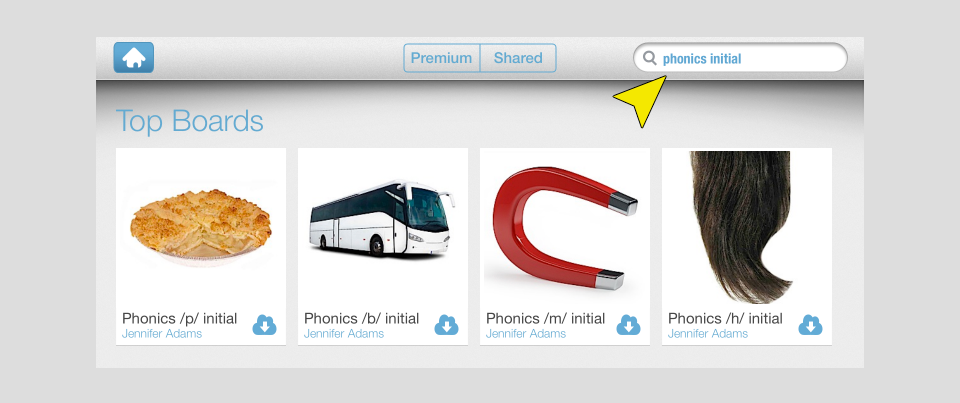
Steps:
- In the source app:
- Tap the Share arrow on your board and select Share on Bitsboard.
- Make sure your board has a unique title and note the creator username on your profile.
- In the destination app:
- Open the Bitsboard Catalog.
- Search by the board name or by your creator username.
- Tap Download to add the board to your collection.
Learn more in our Bitsboard Catalog Guide and What Does "Sharing" Boards Really Mean?.
Summary & Next Steps
- Upgrading to Bitsboard PRO? Use Option 1 (Cloud Sync) to bring over all your boards, custom photos, audio, and user history seamlessly.
- Sharing a single board with a colleague or friend? Use Option 3 (QR Code) or Option 4 (AirDrop / Email).
- Managing a classroom or therapy clinic? Use Option 2 (Classes & Superuser).
If you have any questions or run into any issues transferring your content, check out our All Help Pages or contact our support team.
Start Learning with Bitsboard
Unlock over 30 interactive mini-games, thousands of pre-made learning boards, and the power to fully customize your own lessons. Perfect for toddlers, students, educators, and speech therapists!
Download on the
App Store